Sidebar Widgets
There are different pre-defined widgets that you can find in the Appearance > Widgets.
Main Sidebar:
The main sidebar is usually located on the blog pages which are assigned to the default layout.
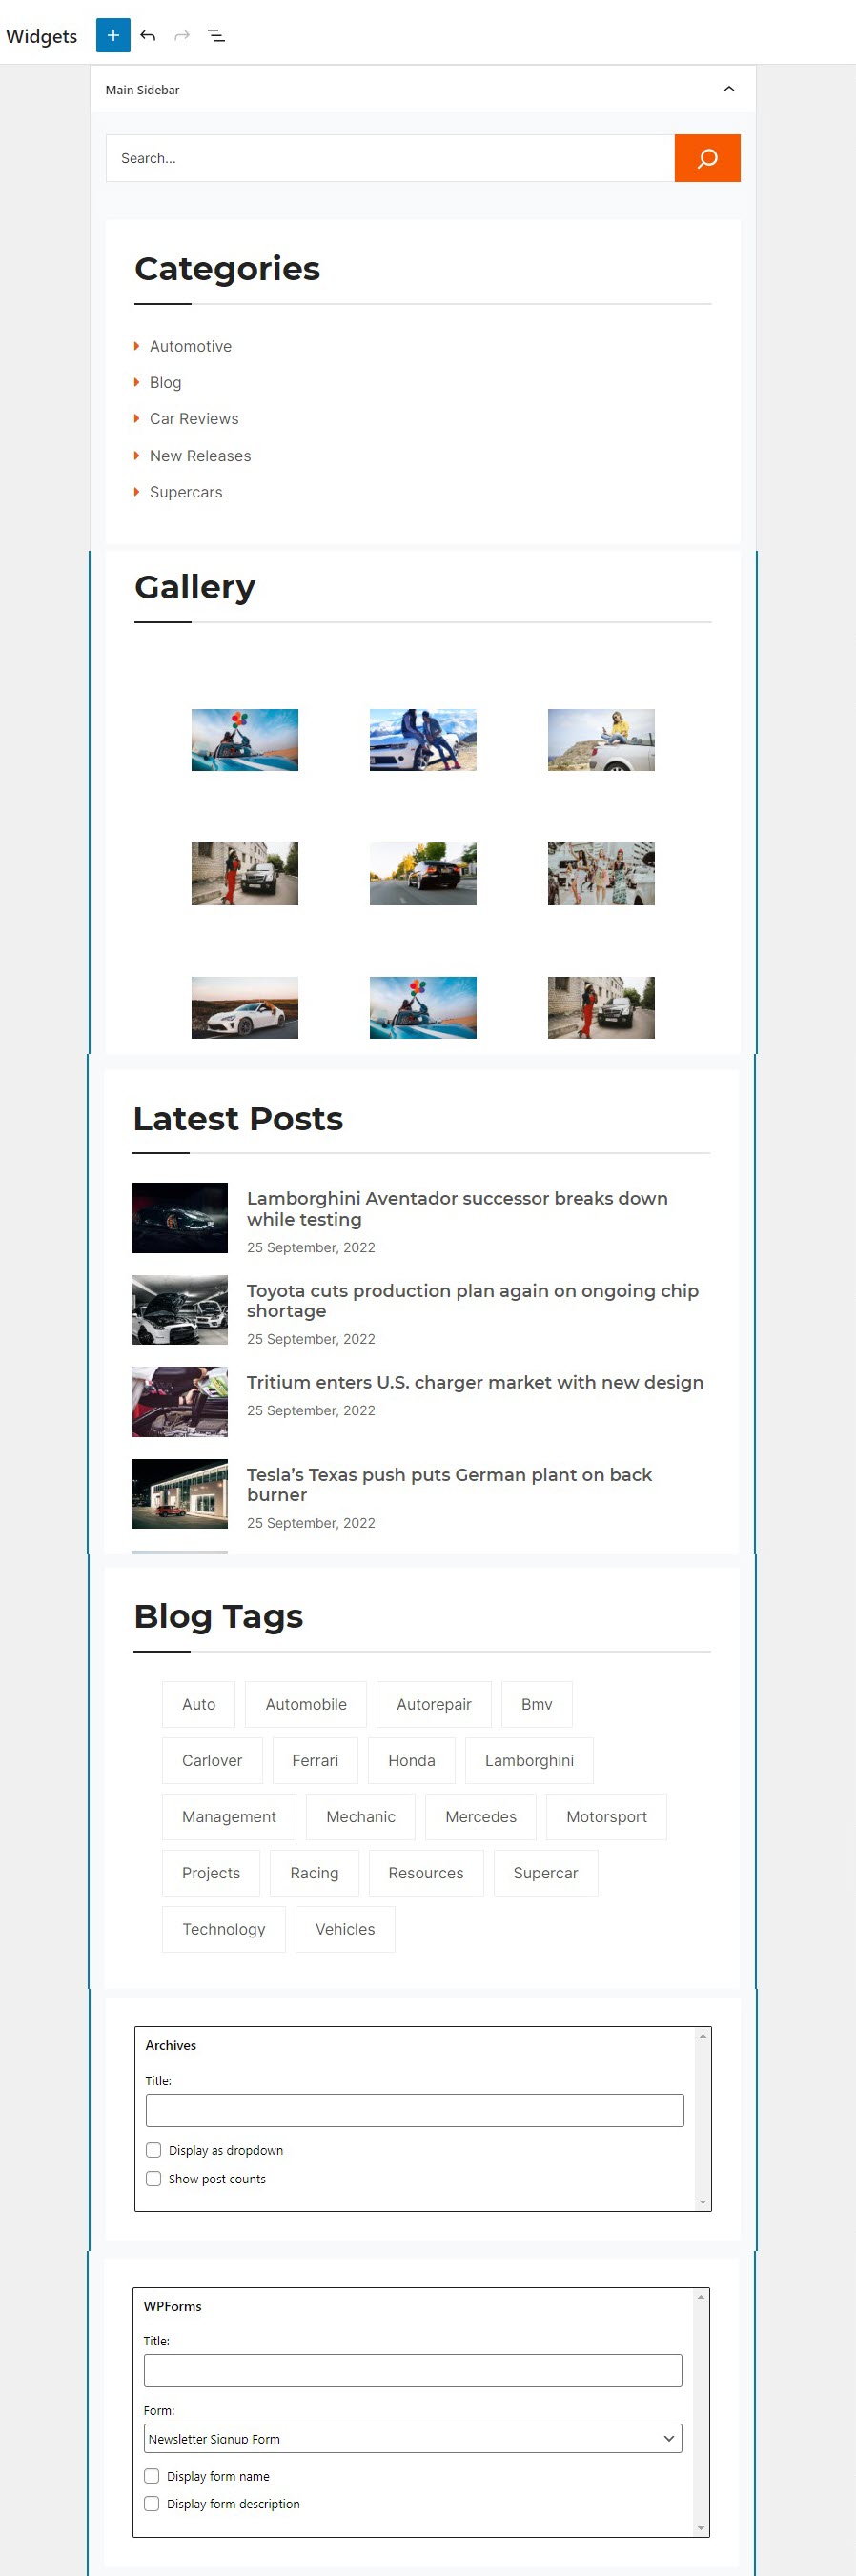
When you click on each section of the main sidebar, you'll see options to edit on the right sidebar.
Shop Sidebar
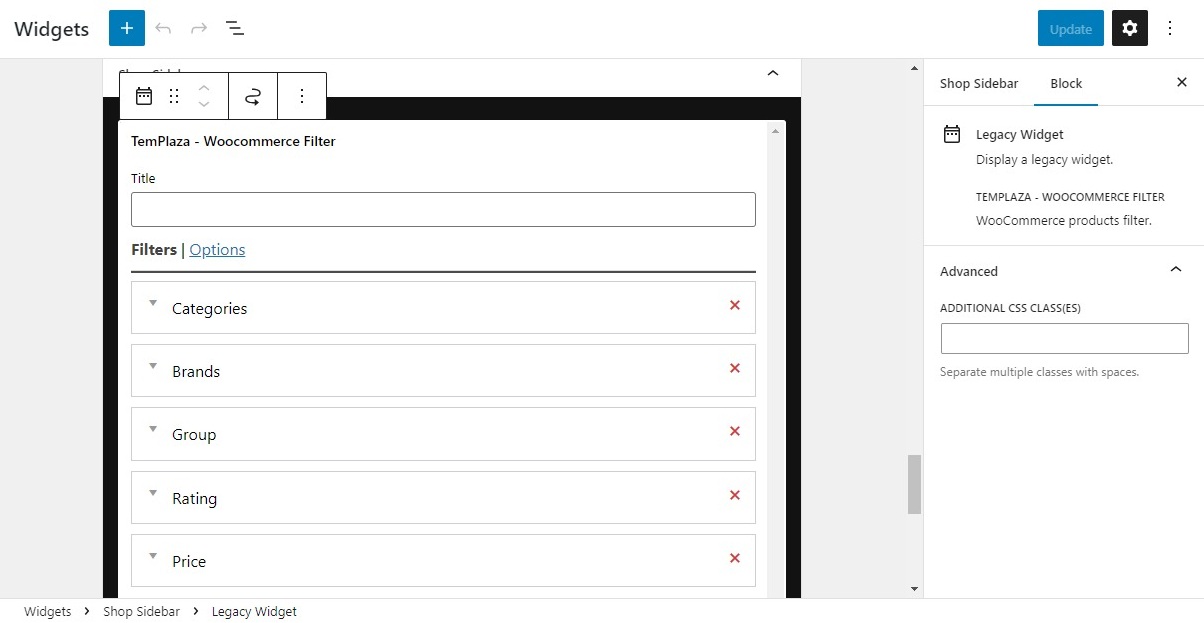
The shop sidebar is located on the shop page. It's built with TemPlaza - Woocommerce Filter which allows you to add various filters to the sidebar such as Category, Brand, Group, Rating, Price, and Tags.
Click on "Add A New Filter" to add more filters to the sidebar.
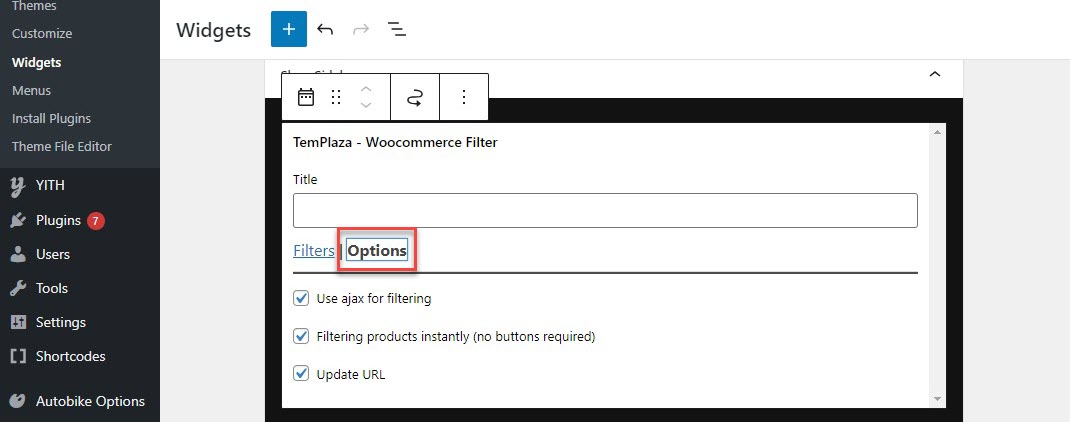
Click on the Options tab > you'll see options:
Use ajax for filtering
Filtering products instantly (no buttons required)
Update URL
Inventory Sidebar
You can find the inventory sidebar on the Inventory page. This sidebar was created with TemPlaza - Advanced Products Filter which allows you to add different advanced products filters according to custom fields (ex: Branch, Make, Model, Manufacturer, Price, Year and so on).
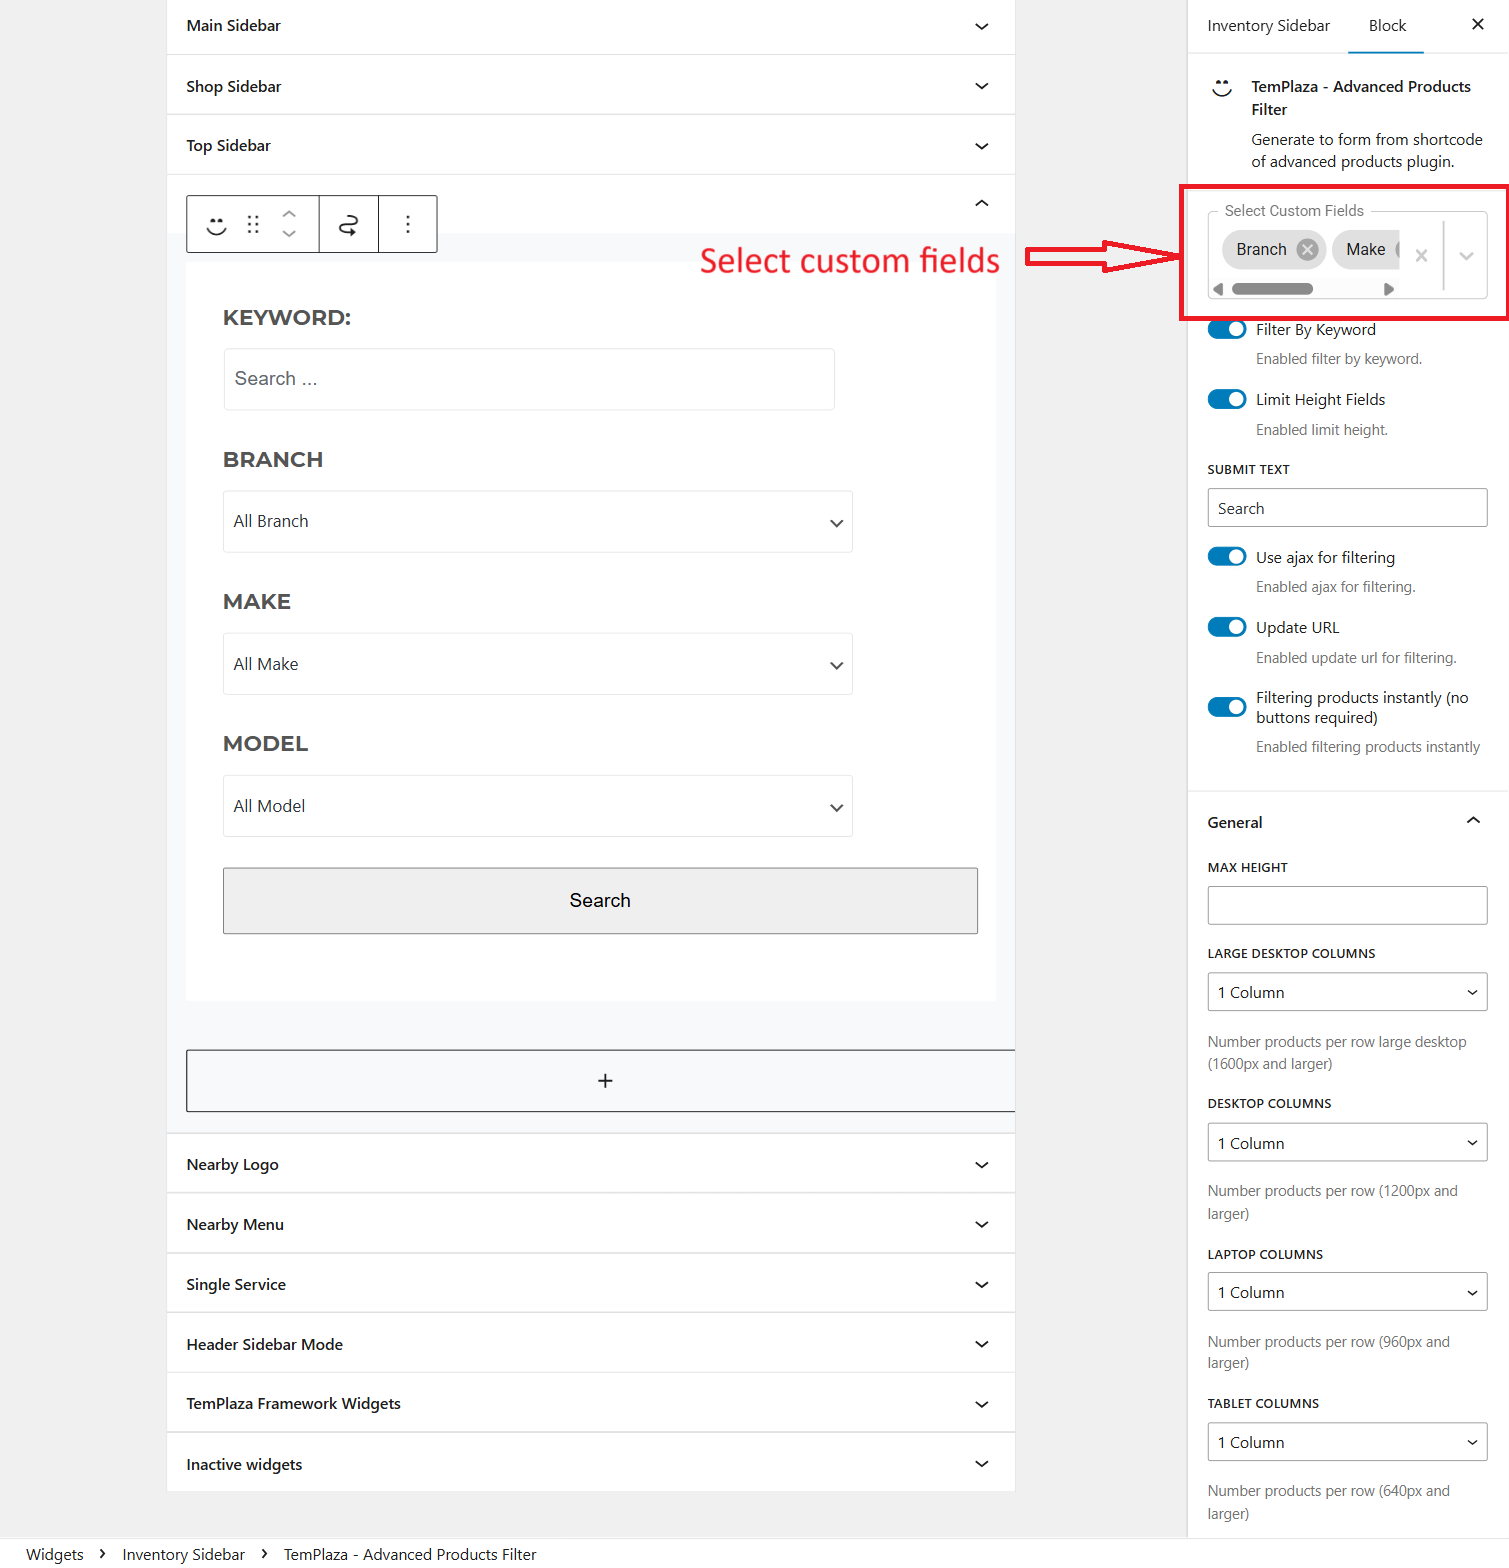
Select custom fields: add custom fields to the sidebar.
Filter by keyword: enable it if you're interested in showing a field to search products by keyword.
Limit Height Fields: Enable it to limit the height of fields.
Submit Text: you can edit the Search button's text here.
Use Ajax for filtering: Enable the option to activate ajax filtering which will hide the search call-to-action button
Update URL: Update the url when filtering custom fields.
Filtering products instantly (no buttons required):
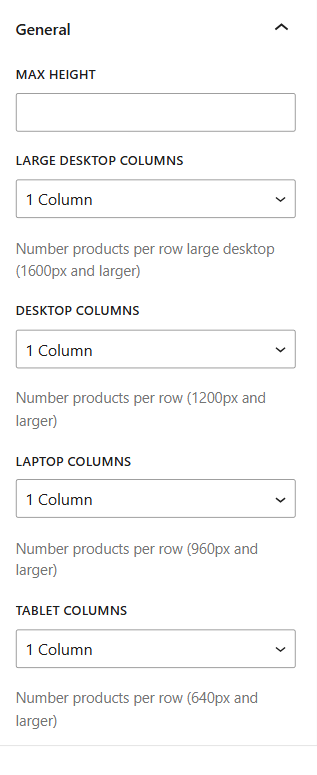
Max height: the height of the filter if it's not expanded (See less).
Below max height are options to configure the number of columns (number of products per row) on different devices: large desktops, desktops, laptops, tablets, and mobile phones.
How to assign a widget to the layout
For the blog pages, you should go to Auto Showroom Options > Settings > Layout > Edit the sidebar > Choose a sidebar widget.
For others, you should go to Auto Showroom Options > Templates > edit the corresponding template > Layout > edit the sidebar.
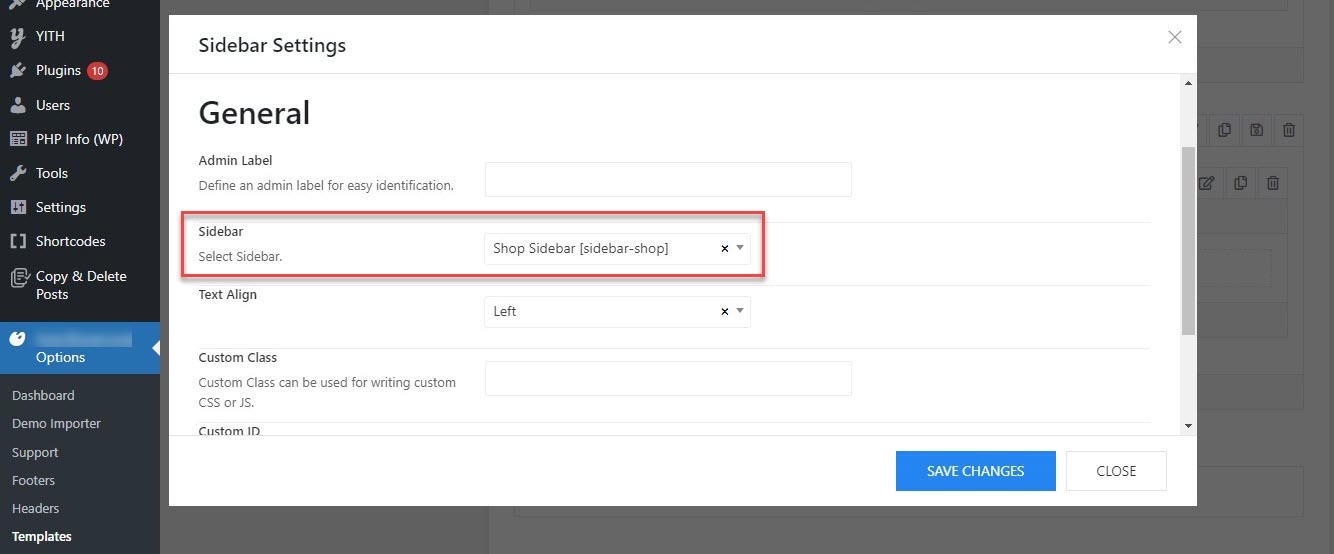
Add a sidebar in a layout
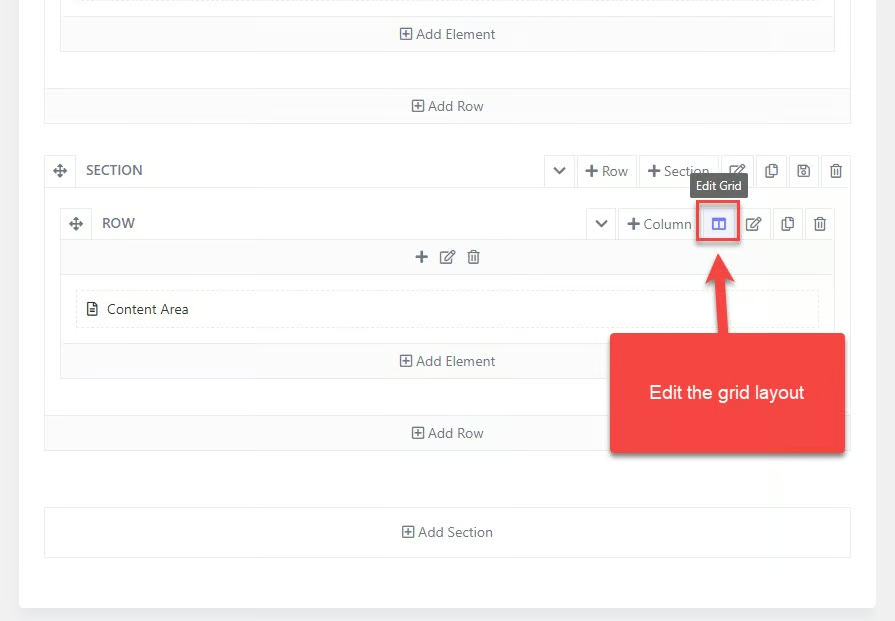
To create a new sidebar, you should go to Autoshowroom Options > Templates > Open your template (ex: Shop layout template) > Layout In the content area section, edit the grid layout Choose one of the available grid layouts or you can customize a layout according to your needs.

Click + to add a new element to the column, then a popup appears and shows you an element panel. Select the Sidebar element to add it to the column.
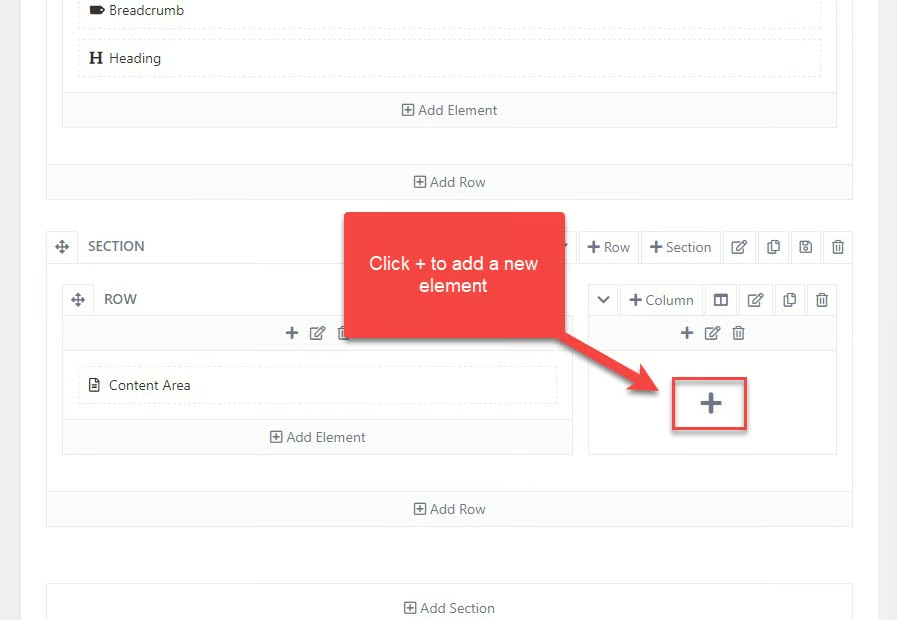
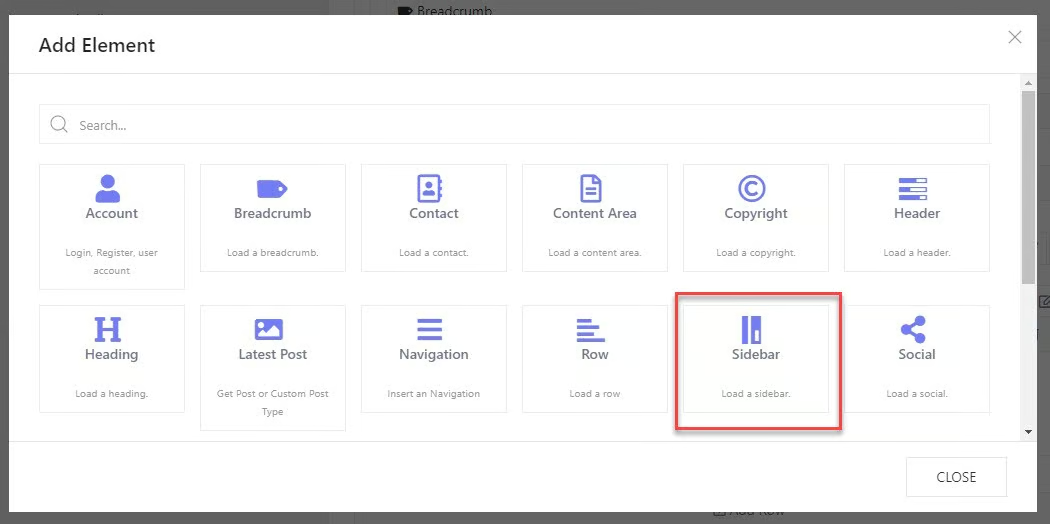
After adding the sidebar element, you can start editing the sidebar and assign a widget to it.