Cause Settings
1.Configure Donate Settings
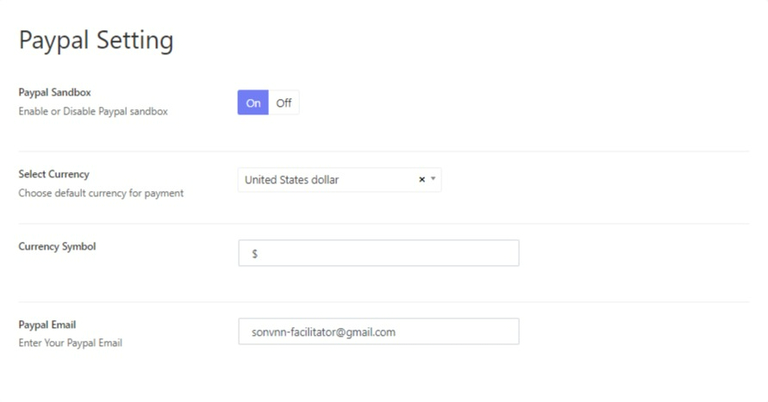
You should go to Wp-dashboard > Cause > Settings. Here you can configure the Paypal settings and Donate Steps
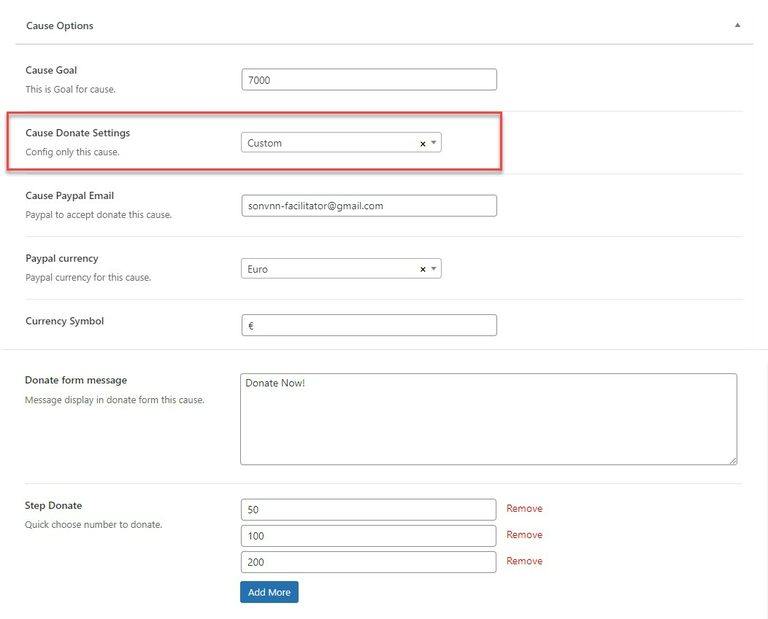
In case you want to customize the donated amount, you can edit each cause article > and configure the cause options there.
2.Global Cause Options
Go to WP-Dashboard > Golden Hearts Options > Settings > Settings > Cause Options
You can see options to choose Cause layout, number of columns, column gap, number of causes per page, number of related causes and others.

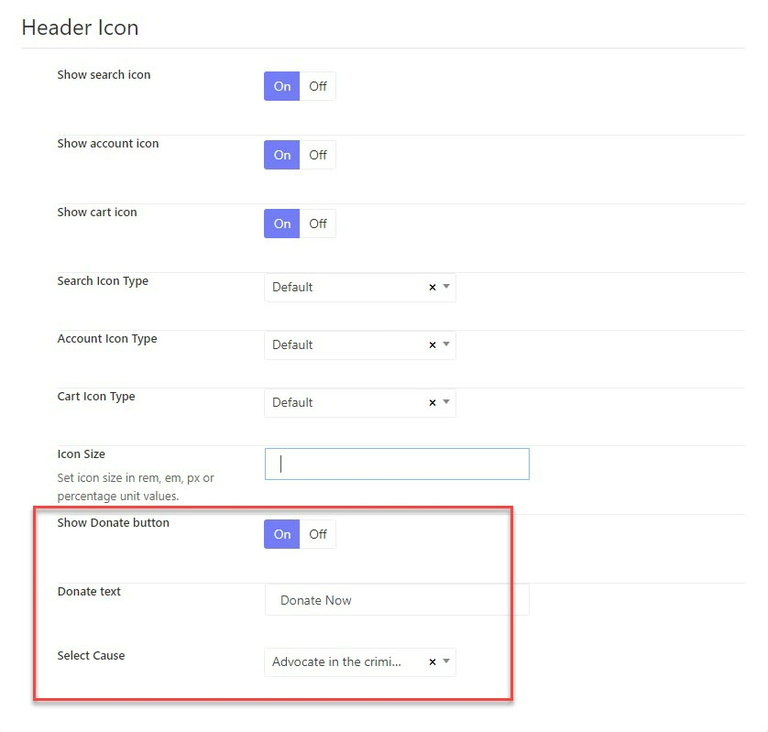
3.Donate button on the header

You should go to Golden Hearts Options > Header > Header Icon > Enable or disable Donate button
You can edit the Donate button text and choose a featured cause linked to the button.
4.Causes List
Causes articles
To create the Causes - List page, you're supposed to create causes articles first.
- Please go to wp-admin > Cause > Add new
- Enter the cause title
- Assign the cause to a category
- Upload a featured image and add intro text to the excerpt box

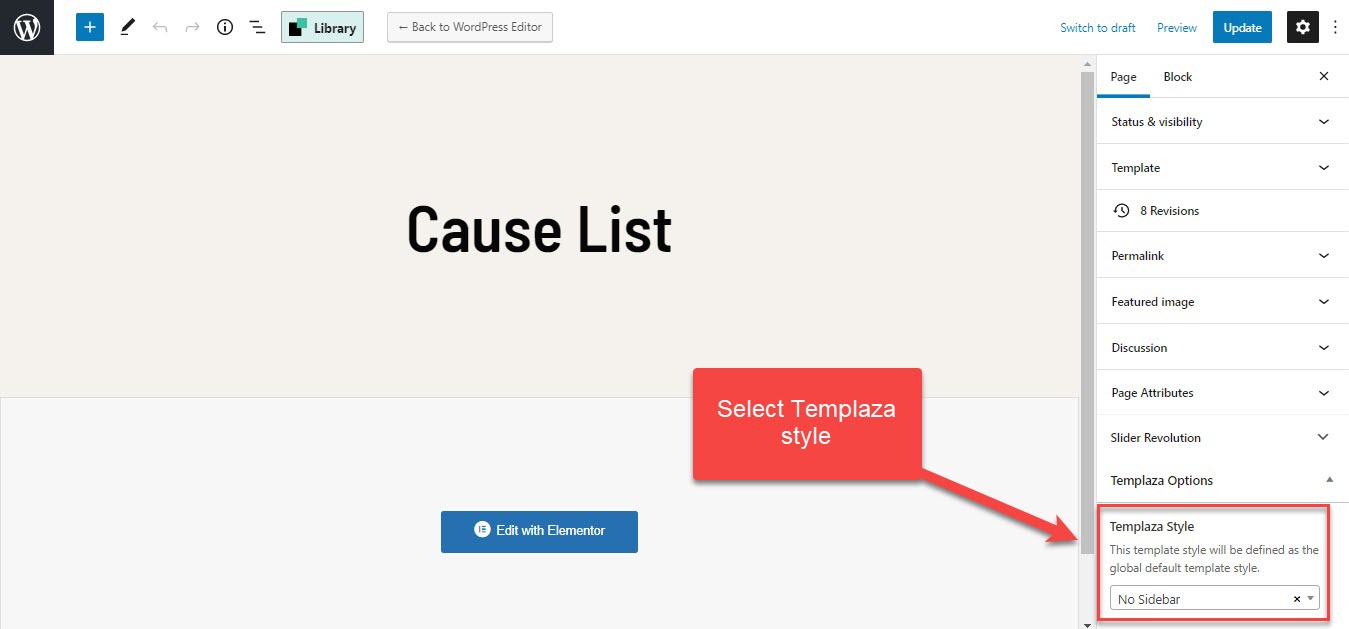
Create a Cause List Page
- Go to Pages > Add New. Here you create a new page
- Enter the page's title
- Select Templaza style: No sidebar
- Edit the page's content with Elementor
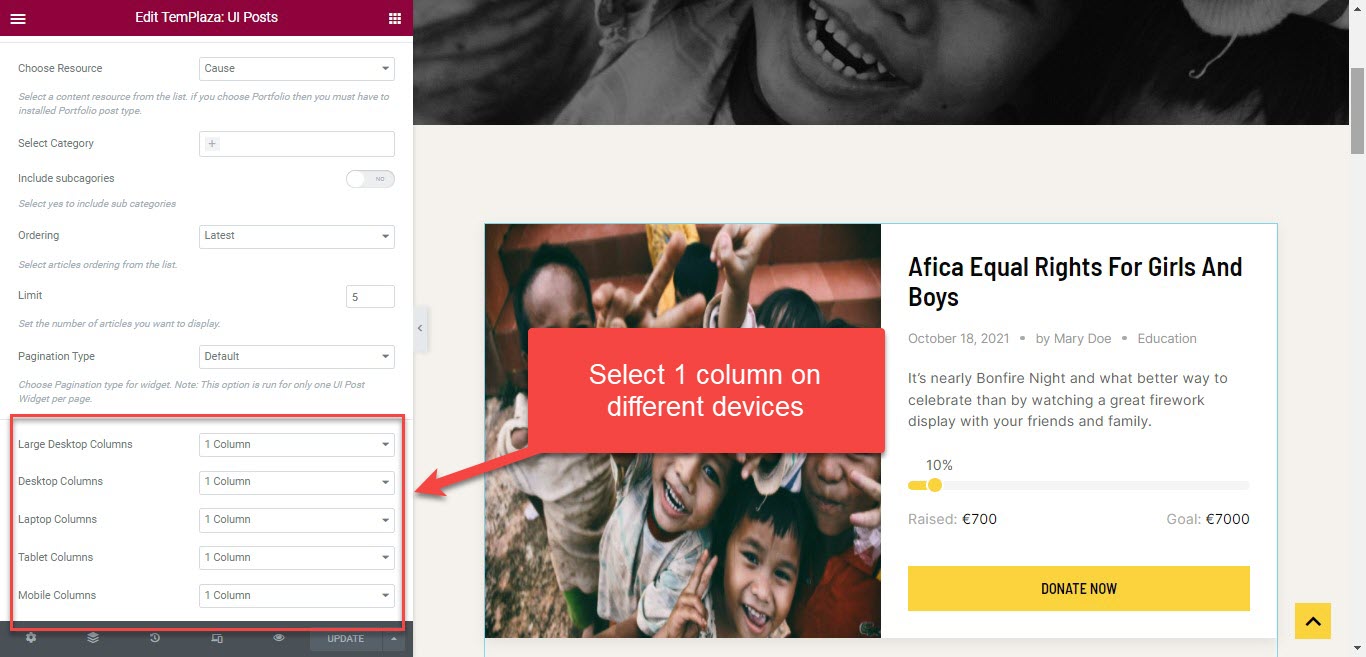
- Add a section, drag & drop UI Posts element to the section
- Select post resource: Cause and choose categories, ordering.
- Configure the number of columns on devices with 1 column only
Create a Cause Grid Page
- Go to Pages > Add New. Here you create a new page
- Enter the page's title
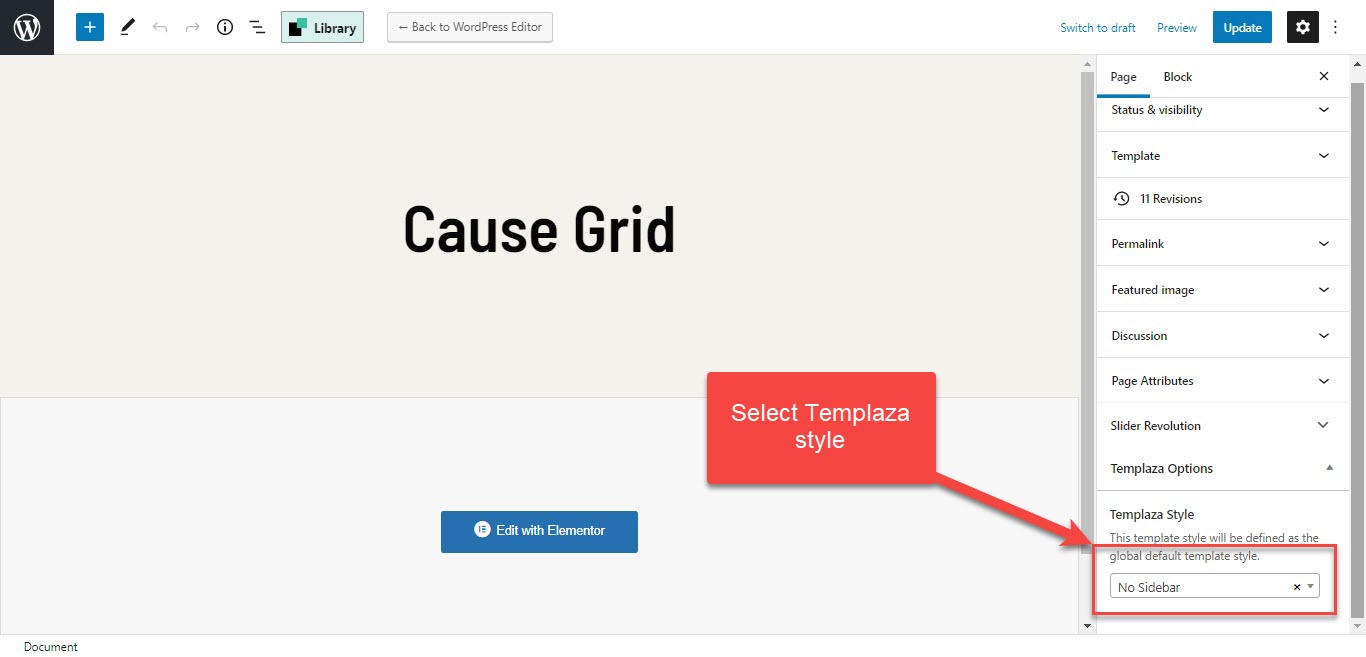
- Select Templaza style: No sidebar
- Edit the page's content with Elementor
- Add a section, drag & drop UI Posts element to the section
- Select post resource: Cause and choose categories, ordering.
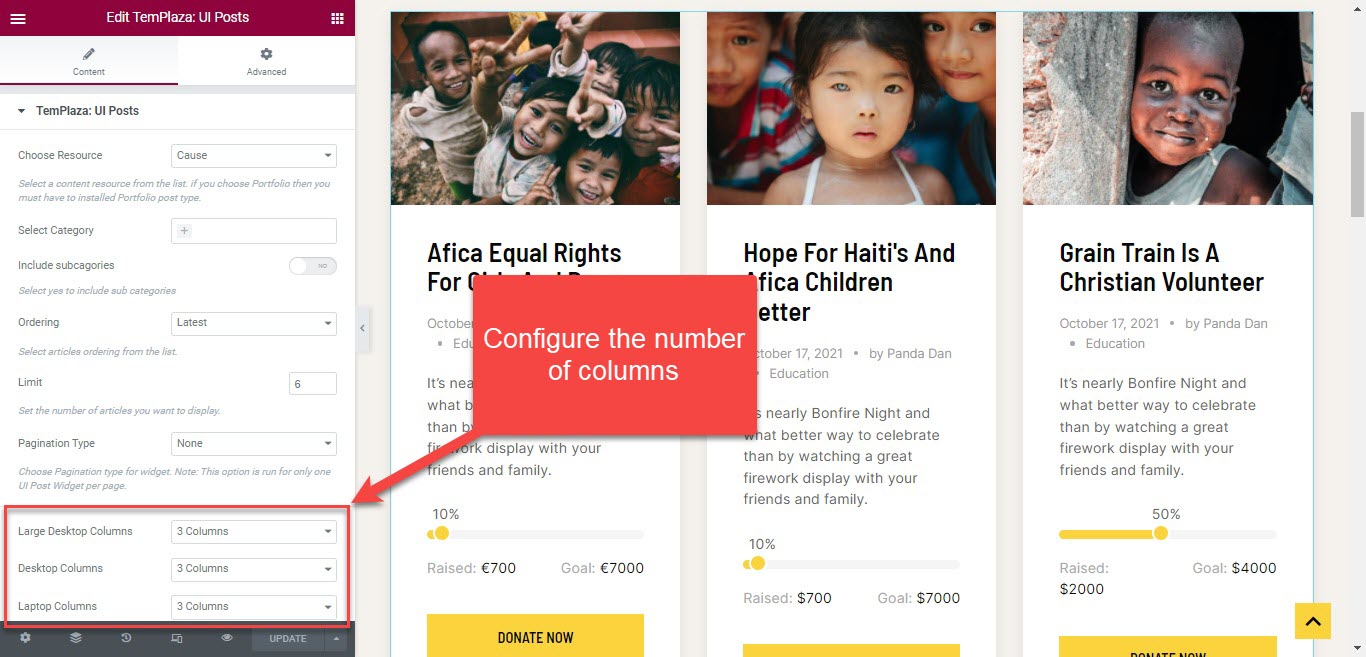
- Select post resource: Cause and choose categories, ordering, and number of columns on devices (should be more than 1 column)